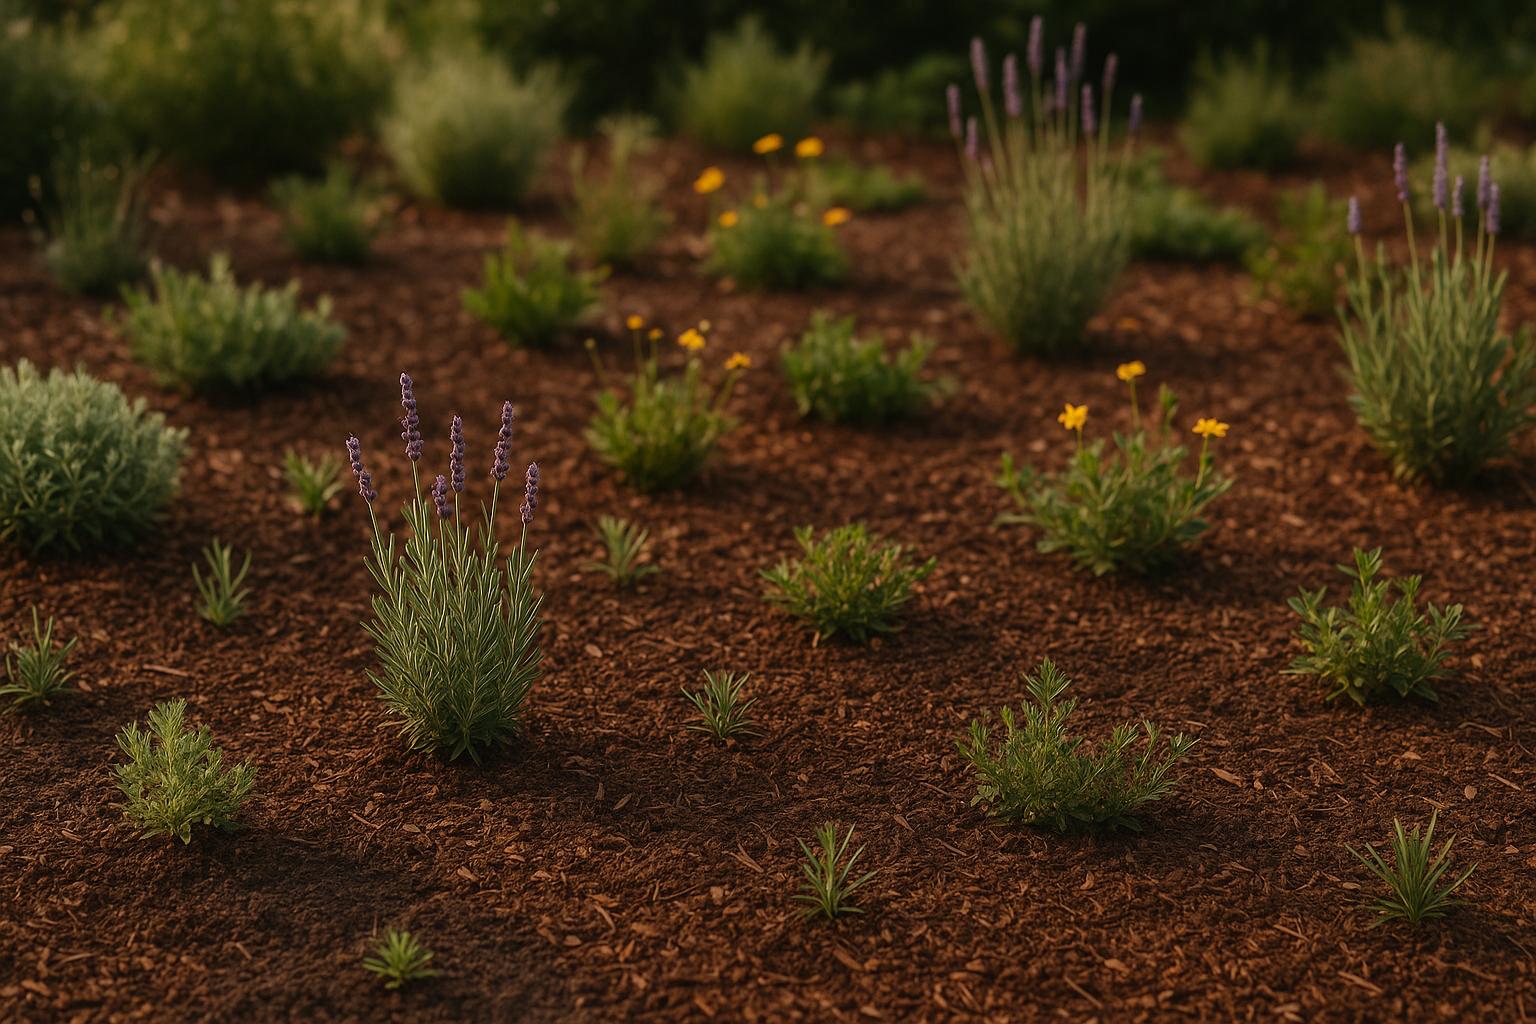
Mulching native plants is a simple way to create healthier, low-maintenance gardens. Here's why it matters: Mulch conserves water, blocks weeds, and improves soil over time. But not all mulches work the same. The key is choosing the right type based on your plants' natural habitat and applying it correctly.
- Organic mulches like wood chips, shredded leaves, and compost improve soil quality as they decompose.
- Inorganic mulches like gravel and rock are durable but don't enrich the soil.
- Apply 2–3 inches of mulch, keeping it away from plant stems to prevent rot.
- Use alternatives like sheet mulching or native groundcovers for specific needs.
Pro tip: Source mulch locally to save money and match your region's conditions. Proper mulching reduces watering, minimizes weeds, and supports plant health without extra effort.
How to Use Every Mulch: The Ultimate Growers' Guide
How to Choose the Right Mulch for Native Plants
Selecting the right mulch for your native plants starts with understanding their natural habitat and the conditions they thrive in. Think about where these plants originally grew - whether it was a forest floor, a prairie, or a rocky hillside - and try to replicate those conditions in your garden.
Your local climate and garden environment also play a significant role. For instance, plants from dry, rocky areas may do well with different mulches than woodland varieties. Consider whether you need an organic mulch to improve soil quality or an inorganic option for durability, and factor in your budget when making a choice.
Organic Mulch Types
Organic mulches not only protect your plants but also enrich the soil as they break down over time. Here’s a look at some popular options:
- Wood chips: These decompose slowly, making them great for trees and shrubs that benefit from gradual soil improvement. Fresh wood chips work especially well around established trees like oaks and maples. Just be sure to keep them away from plant stems to avoid trapping moisture.
- Shredded leaves: Mimicking a natural forest floor, shredded leaves are ideal for woodland plants. Oak leaves, in particular, add a slightly acidic touch that many native plants enjoy. You can easily create your own by mowing over fallen leaves in the fall.
- Pine needles (pine straw): Perfect for acid-loving plants such as blueberries, azaleas, and mountain laurel, pine needles allow water to penetrate while offering a tidy appearance. They also last longer than regular leaves, usually staying in place for 12 to 18 months.
- Compost: If you’re growing nutrient-hungry wildflowers or prairie plants, compost is a great choice. Apply a 1–2 inch layer and lightly mix it into the topsoil for the best results.
- Grass clippings: When used sparingly, grass clippings can work well in vegetable gardens with native edible plants. Make sure they’re pesticide-free and applied in thin layers to prevent matting, as they decompose quickly and add nitrogen to the soil.
Inorganic Mulch Types
If you’re looking for low-maintenance options, inorganic mulches might be the way to go. While they don’t enrich the soil, they’re durable and long-lasting.
- Rock mulch: Ideal for xeriscapes and desert gardens, rock mulch supports drought-tolerant plants like cacti and succulents. Materials such as decomposed granite, lava rock, and river stones help mimic natural desert conditions by reflecting and retaining heat.
- Gravel mulch: Best for plants from rocky or mountainous regions, gravel provides excellent drainage and reduces the risk of crown rot. Stick to gravel sizes between ¼-inch and ¾-inch for better weed suppression and ease of use.
- Recycled rubber mulch: This durable option works well in high-traffic areas or playgrounds with native plantings. However, it doesn’t improve soil health and can become very hot in summer, so it’s not suitable for all plants.
Inorganic mulches have the advantage of lasting 5–10 years without needing replacement. They’re also fire-resistant, which can be a big plus in areas prone to wildfires. However, they don’t add nutrients to the soil or promote beneficial microorganisms like organic mulches do.
Where to Source Mulch Responsibly
Finding quality mulch doesn’t have to break the bank. Many cities offer free or low-cost wood chips through municipal programs or arborist companies. These mulches often come from local trees, making them well-suited to your region’s climate.
Local farms and nurseries are another excellent source for organic mulches. They often stock region-specific options, like pine straw in the Southeast or cedar mulch in the Pacific Northwest. If you’re unsure where to start, professionals like those at Thrive Lot can connect you with reliable suppliers who understand the needs of native plants in your area.
When sourcing mulch, avoid anything with a sour smell, as this could indicate harmful anaerobic decomposition. Also, steer clear of mulch from black walnut trees, which contain juglone - a natural herbicide that can inhibit the growth of many plants.
For rock mulches, check out local quarries. They often have competitive prices and carry stones that are well-suited to your region. Buying in bulk from a quarry is usually more cost-effective than purchasing bagged products from big-box stores.
How to Prepare Your Garden Before Applying Mulch
Getting your garden ready before laying down mulch is a crucial step that ensures your native plants thrive. Proper preparation not only improves water absorption and soil health but also makes long-term maintenance much easier.
Steps to Prepare the Site
Start by clearing the area of debris and weeds. Remove fallen branches, old plant material, and dig out any stubborn weeds. Next, level the soil by raking high spots and filling in low areas - this helps keep the mulch in place, especially during heavy rains. If the soil is compacted, loosen the top 3–4 inches with a garden fork, but be careful not to disturb the roots of existing plants.
To keep mulch contained, consider installing edging. Materials like untreated cedar boards, stone, or steel work well. Set the edging about 1 inch above the ground for effective containment and easy mowing. Once the area is cleared and leveled, water it thoroughly. This helps the mulch settle properly and kick-starts the decomposition process.
With these steps completed, your garden bed will be ready for weed management and mulching.
Should You Use Weed Barriers?
After preparing the soil, you might wonder if weed barriers are a good idea. While they can help, avoid using traditional landscape fabric under organic mulches. Petroleum-based fabrics can compact the soil, block water and air from reaching the roots, and hinder beneficial organisms like earthworms from doing their job. They can also interfere with native plants' ability to reseed naturally.
Even with fabric in place, weeds can still grow through organic mulch layers, and their roots may become tangled in the fabric, making them harder to remove. Instead, opt for biodegradable options like cardboard or newspaper. These materials provide temporary weed suppression, break down over time, and enrich the soil.
However, landscape fabric can be useful in specific cases. If you're using inorganic mulches like river rock, gravel, or rubber mulch, fabric underneath can prevent weeds from sprouting through the stones. Since these materials don’t decompose or create new soil layers, fabric can be a practical choice.
How Much Mulch Should You Apply?
The depth of mulch matters. Apply 2–3 inches of organic mulch to suppress weeds while still allowing water and air to pass through. Use a ruler to measure the depth - guessing can lead to problems. Too much mulch can trap excess moisture, while too little won’t provide enough weed protection.
Keep the mulch 3 to 4 inches away from plant stems and tree trunks. Piling mulch directly against them can trap moisture, leading to rot or disease. Instead, create a small crater or donut shape around each plant.
For newly planted natives, use a thinner layer - about 1 to 2 inches - until their root systems are well-established. Young plants need good air circulation, and too much mulch can hold excessive moisture. Some native species, particularly those adapted to rocky or desert environments, may need even less mulch (around 1 inch) or may benefit more from inorganic mulches that don’t retain moisture.
If your garden is on a slope, reduce the mulch depth to 1 or 2 inches to prevent it from washing away during heavy rains. Larger wood chips or temporary barriers can also help keep the mulch in place.
Mulching Methods for Eco-Friendly Gardens
When it comes to mulching, there are several techniques to choose from, each tailored to different goals and garden conditions. These methods not only help create sustainable landscapes but also support native plants and local ecosystems in meaningful ways.
Standard Mulch Application Method
This is the go-to method for many gardeners. It involves spreading mulch evenly over prepared soil around your plants. It’s a straightforward approach, ideal for established gardens where the goal is to suppress weeds and retain moisture without needing major soil improvements.
Start by preparing your garden bed. Then, spread a 2–3-inch layer of organic mulch evenly across the surface. Use a rake or your hands to distribute the material steadily from one end of the bed to the other. The key is consistency - an uneven layer can lead to dry patches or allow weeds to sneak through.
Once the mulch is in place, lightly rake the surface to ensure it’s smooth and allows water to pass through easily. Materials like shredded bark, wood chips, or leaf mold work particularly well with this method.
This technique is quick and efficient, making it perfect for covering large areas with minimal effort. If your soil is already in good shape and doesn’t need extra amendments, this is likely the best option. For those looking to improve soil quality more significantly, the sheet mulching method might be a better fit.
Sheet Mulching Step-by-Step
Sheet mulching, often referred to as lasagna gardening, is a fantastic way to build nutrient-rich soil while keeping weeds at bay. It’s especially effective for transforming lawns into native plant gardens or improving poor soil conditions.
Here’s how to do it:
- Start by mowing down grass or weeds as short as possible, but leave the roots intact.
- Lay plain cardboard sheets directly over the area, overlapping the edges by about 6 inches to eliminate gaps. Be sure to remove any tape or staples from the cardboard, and soak it thoroughly with water.
- Add a 4–6-inch layer of carbon-rich materials like dried leaves, straw, or wood chips. Follow this with a 2–3-inch layer of nitrogen-rich materials such as fresh grass clippings, kitchen scraps, or aged manure.
- Continue alternating carbon and nitrogen layers, finishing with a carbon layer. Water each layer as you go to encourage decomposition.
Initially, the pile will stand about 12–18 inches tall, but it will settle over time. You can plant immediately by creating small pockets in the layers or wait 3–6 months for the materials to break down further.
This method works best when started in the fall, allowing the layers to decompose over winter and create nutrient-packed soil by spring.
If you’re looking for a more natural approach, you might consider using native groundcovers as living mulch instead.
Using Native Groundcovers as Living Mulch
Living mulch offers a dynamic alternative to traditional mulching. By planting low-growing native species, you can naturally suppress weeds, reduce maintenance, and create a thriving habitat for local wildlife.
For sunny areas, native sedges like Pennsylvania sedge (Carex pensylvanica) or buffalo grass (Bouteloua dactyloides) are excellent choices. These plants form dense mats that crowd out weeds and need minimal water once established. Space them 6 to 12 inches apart, depending on their mature spread.
If you prefer flowering groundcovers, creeping phlox (Phlox subulata) or wild strawberry (Fragaria virginiana) can create vibrant carpets that attract pollinators. Both spread through runners or self-seeding, making them ideal for filling in spaces over time. For shady spots, consider native violets (Viola sororia) or wild ginger (Asarum canadense), which provide lush coverage and support local ecosystems.
While living mulch requires more planning and effort upfront, it pays off by reducing long-term maintenance and enhancing biodiversity. Water these plants regularly during their first growing season to establish strong roots. Once they’re settled, they’ll thrive with minimal care, relying mostly on natural rainfall.
sbb-itb-1d926cd
How to Maintain and Refresh Your Mulch
Keeping your mulch in good shape is essential for your garden. It helps the soil retain moisture, keeps weeds under control, and regulates temperature - key benefits for native plants. But like anything in your yard, mulch needs some upkeep to stay effective. Let’s dive into when and how to refresh your mulch to keep these benefits going strong.
When and How to Add New Mulch
Plan to refresh your mulch every year by adding about an inch of fresh material, especially if you notice it fading, compacting, crusting, or if weeds are starting to pop up. However, if your mulch smells sour, looks slimy, or has visible fungal growth, it’s time to remove it completely and replace it with new material.
Organic mulches naturally break down over time, thanks to fungi, microorganisms, and insects. This decomposition process, which is more active in warm and moist conditions, can cause the mulch to lose its structure, color, and ability to protect the soil. If your mulch starts resembling compost or shows signs of mold, like artillery fungus, it’s a clear signal to replace it entirely.
Adjusting Mulch Through the Seasons
Spring is often the best time to refresh your mulch. Right before weeds start sprouting and plants begin their growth spurt, give your garden a seasonal update. During this spring refresh, make sure your mulch layer is consistent in depth, especially around your native plants. A layer less than 2 inches thick won’t do its job - keeping weeds at bay, holding moisture, and maintaining soil temperature.
Seasonal adjustments are important, but so is properly setting your mulch with water.
Watering After Mulch Application
When you first apply fresh mulch, it can affect how water moves through your garden. Organic materials like wood chips or shredded bark often soak up water initially, which might prevent it from reaching the soil right away. To help the mulch settle and stay in place (especially on windy days), water it thoroughly right after application. This also kickstarts the decomposition process, which benefits your soil.
For newly planted native gardens, keep a close eye on soil moisture in the first few weeks after mulching. Check under the mulch to ensure water is making its way to the plant roots. You might need to water more slowly or for longer periods to ensure proper penetration. Once the mulch settles and your plants are well-established, you’ll likely notice you can water less often, as the mulch helps lock in moisture and reduce evaporation.
Mulch Types Compared: Pros and Cons
Building on earlier discussions about mulch selection and application techniques, this section breaks down the pros and cons of common mulch types. Choosing the right mulch for a native garden means weighing its benefits and drawbacks while considering your garden’s conditions, budget, and goals. Factors like moisture retention, weed suppression, and how the mulch impacts the environment can guide your decision. The chart below offers a quick side-by-side comparison of popular mulch options.
Mulch Comparison Chart
Here’s how various mulch types stack up:
| Mulch Type | Moisture Retention | Weed Control | Supports Wildlife | Longevity | Cost | Best For | Limitations |
|---|---|---|---|---|---|---|---|
| Wood Chips | Excellent | Very Good | High | 2–3 years | Low–Medium | Large areas, trees, shrubs | May temporarily reduce nitrogen in soil |
| Shredded Bark | Good | Good | Medium | 1–2 years | Medium | Slopes, decorative areas | Lightweight and prone to being blown away |
| Leaf Mold | Excellent | Fair | Very High | 6–12 months | Free | Woodland natives, shade gardens | Breaks down quickly |
| Pine Needles | Good | Good | Medium | 1–2 years | Low–Medium | Acid-loving plants | Availability can vary by region |
| Straw | Good | Fair | Medium | 6–12 months | Low | Vegetable gardens, temporary covers | May contain weed seeds |
| Gravel | Poor | Excellent | Low | Permanent | High | Drought-tolerant natives, pathways | Doesn’t improve soil and retains heat |
| Landscape Fabric | Variable | Excellent | Very Low | 5–10 years | Medium–High | Persistent weed problems | Blocks beneficial soil organisms |
This chart highlights the strengths and weaknesses of each mulch type, helping you match them to your garden’s specific needs. For instance, wood chips excel at retaining moisture and suppressing weeds while also supporting beneficial insects and soil life. On the other hand, leaf mold enriches soil and enhances habitat value but decomposes more quickly.
If you’re looking for low-maintenance options, gravel and landscape fabric offer excellent weed control. However, they don’t contribute to soil health or wildlife support, making them better suited for pathways, rock gardens, or areas where maintenance needs to stay minimal.
When budgeting for mulch, free or inexpensive options like municipal wood chips or homemade leaf mold can significantly reduce costs, especially for larger gardens.
Climate also plays a role in selecting mulch. In hot, dry areas, mulches that insulate and retain moisture are ideal. In regions with heavy rainfall, lighter mulches that allow air circulation can help prevent fungal issues.
You don’t have to stick to just one type of mulch. Many gardeners successfully combine different mulches to take advantage of their unique benefits. For example, wood chips work well around trees and shrubs, leaf mold fits perfectly in shaded woodland areas, and gravel is ideal for walkways. This mix-and-match approach can maximize benefits while keeping costs in check.
For tailored advice on mulching strategies and sustainable native plant care, consider reaching out to Thrive Lot experts who understand the unique needs of your region.
Key Takeaways
Mulching native plants plays a big role in keeping your garden healthy while supporting local wildlife. The type of mulch you choose depends on your garden's needs, your budget, and how much upkeep you're prepared to handle. Organic mulches like wood chips and leaf mold not only improve soil health but also provide a home for beneficial insects. However, they do need regular replenishment. On the other hand, inorganic mulches like gravel offer long-term weed control but don’t enhance the soil. Each type serves a different purpose, so pick one that aligns with your gardening goals.
Before applying mulch, make sure to remove weeds, water your plants, and spread the mulch at the right depth - usually 2 to 4 inches for most organic types.
Timing is also key. Mulching in spring helps lock in moisture for the hot summer months. Avoid mulching when the ground is frozen or when plants are actively sprouting.
For new native plant gardens, sheet mulching is a great option. This method suppresses weeds and builds soil at the same time, making it especially useful for large areas or when transitioning a lawn into a native habitat.
If you’re looking for a more natural, long-term solution, consider living mulches. Native groundcovers like wild ginger, coral bells, or native sedges provide permanent coverage. These plants eliminate the need for regular mulch replacement while supporting local ecosystems.
To save money, source materials locally. Municipal wood chip programs, fall leaf collections, or working with local tree services can provide free or low-cost organic mulch. A cubic yard of mulch covers about 108 square feet at a 3-inch depth.
Don’t forget about seasonal upkeep. Organic mulches should be refreshed annually or as needed, adjusting the thickness based on weather and plant growth. Keep an eye on moisture levels, especially during the first year after applying mulch.
With proper mulching, you’ll reduce watering, keep weeds in check, and enrich your soil, creating a garden that’s both low-maintenance and environmentally friendly. If you need help tailoring these strategies to your area, Thrive Lot can connect you with local landscapers who specialize in native plant systems and can guide you through the process.
FAQs
What type of mulch is best for native plants: organic or inorganic?
When deciding between organic and inorganic mulch, it all comes down to your specific needs. For native plants, though, organic mulch tends to be the better fit. Materials like bark, leaves, and wood chips naturally break down over time, adding nutrients to the soil and encouraging healthy plant growth. This process mirrors the conditions native plants typically thrive in.
On the other hand, inorganic mulch - like gravel or stones - has its perks. It lasts longer and needs less upkeep, but it doesn’t contribute to soil fertility. While it can be a practical choice in certain cases, organic mulch is often favored for native plants because it nurtures soil health and helps create a balanced, thriving ecosystem. This approach aligns with the principles of ecological landscaping.
How can I find mulch locally and make environmentally responsible choices?
If you're looking to source mulch locally and responsibly in the US, start by reaching out to nearby garden centers, nurseries, or landscaping companies. Many of these businesses offer untreated, organic mulch made from recycled wood or green waste. By choosing local suppliers, you not only reduce transportation emissions but also support businesses in your community.
Another option is to explore community programs that provide free or low-cost mulch. These programs often recycle tree trimmings or yard waste into mulch, making them a budget-friendly and environmentally conscious choice. For natural and safe options, consider untreated hardwood chips or materials like pine straw, which work well for most gardens. Be cautious about using mulch with synthetic dyes or chemicals, as these can harm native plants and disrupt the local ecosystem.
Can living mulches be used in all gardens, and how do they compare to traditional mulching?
Living mulches work well in many settings - vegetable gardens, flower beds, and even small farms. They offer a range of benefits, including weed suppression, better soil moisture retention, and a natural boost of nutrients to the soil.
Unlike traditional mulches, living mulches require less upkeep and contribute to long-term soil health. They also encourage biodiversity and help reduce erosion. For gardeners aiming to adopt eco-conscious methods, living mulches can support a thriving, self-sustaining garden.


